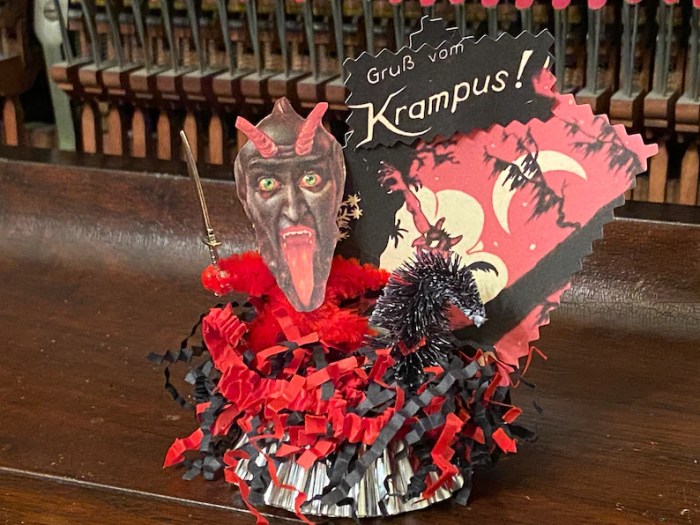
Krampus Decoration offers a thrilling exploration into the world of this unique holiday figure. From its ancient folklore roots to its modern interpretations in home décor, crafting, and party themes, Krampus decorations provide a fascinating blend of the eerie and the festive. This guide delves into the history, symbolism, and practical crafting techniques behind these captivating decorations, offering inspiration for both seasoned crafters and curious newcomers alike.
We’ll examine various styles, materials, and techniques, showcasing unique designs suitable for diverse settings, ensuring your holiday celebrations are uniquely memorable.
Crafting Krampus Decorations

Creating authentic and terrifying Krampus decorations can transform your Halloween or Yuletide display. This involves a range of techniques and materials, from the classic papier-mâché mask to intricately carved wooden figures. The following sections detail methods for crafting various Krampus-themed decorations, allowing for a personalized and chilling aesthetic.
Papier-Mâché Krampus Mask Creation
Crafting a Krampus mask using papier-mâché is a relatively accessible method, ideal for beginners. First, create a base form for your mask using a balloon or a sculpted clay model, ensuring the desired shape and size. Then, apply layers of strips of newspaper dipped in a paste made from flour and water. Allow each layer to dry completely before adding the next, building up a sturdy and resilient structure.
Once dry, carefully remove the balloon or clay form. Next, sculpt the mask’s features using more papier-mâché, adding details like the characteristic horns, furrowed brow, and snarling mouth. After the final layer dries, sand the surface smooth and apply several coats of primer. Finally, paint the mask with acrylic paints, using dark browns, grays, and blacks to achieve a realistic and menacing appearance.
Consider adding details like textured fur using fabric scraps or faux fur.
Wood Carving a Krampus Figure, Krampus Decoration
Carving a Krampus figure from wood requires skill and patience but yields a remarkably detailed and enduring decoration. Begin by selecting a suitable piece of wood, such as basswood or pine, ensuring it is free from knots and cracks. Sketch your Krampus design onto the wood using a pencil, paying close attention to the proportions and details. Use various carving tools, such as gouges and chisels, to carefully remove the wood according to your sketch.
Start with rough shaping, gradually refining the details as you progress. Pay special attention to the horns, facial features, and the fur-like texture of the Krampus’s body. Once the carving is complete, sand the surface smooth and apply a protective finish, such as varnish or polyurethane, to preserve the wood and enhance its appearance.
Creating Realistic Krampus Horns
The horns are a defining feature of the Krampus, and their creation can significantly impact the overall effect of your decoration. Several materials can be used to achieve realistic horns. For a lightweight option, consider using foam. Cut and shape the foam into the desired horn shape, then cover it with layers of papier-mâché for durability. Alternatively, you can sculpt horns from air-dry clay, allowing for greater detail and texture.
For a more robust and durable horn, consider using resin, carefully molding it into the desired shape and allowing it to cure completely. Once the horns are formed, paint them using dark brown, black, or even a slightly iridescent color to mimic the sheen of real horns.
Crafting a Krampus-Themed Garland Using Repurposed Materials
Creating a Krampus-themed garland offers a sustainable and creative approach to decoration.Here’s a step-by-step guide:* Materials: Cardboard scraps, recycled paper, paint, string or twine, scissors, glue.
Steps
Cut out various Krampus-related shapes from the cardboard and paper, such as small Krampus faces, claws, or simple geometric patterns.
Paint the cutouts using dark colors to match the Krampus theme. Let the paint dry completely.
Once dry, punch holes at the top of each cutout.
Thread the string or twine through the holes, creating a garland. Vary the spacing between the cutouts for a more dynamic look. Finally, add any additional embellishments, such as small bells or beads, to further enhance the garland.
Whether you’re captivated by the chilling folklore of Krampus or simply seeking unique and eye-catching holiday decorations, exploring the world of Krampus-themed artistry is a rewarding experience. From the intricate details of handcrafted masks to the atmospheric impact of strategically placed decorations, the potential for creativity is vast. This guide has provided a foundation for understanding the history, symbolism, and practical application of Krampus decorations, empowering you to create truly unforgettable holiday displays that capture the spirit—and the slightly unsettling charm—of this iconic figure.