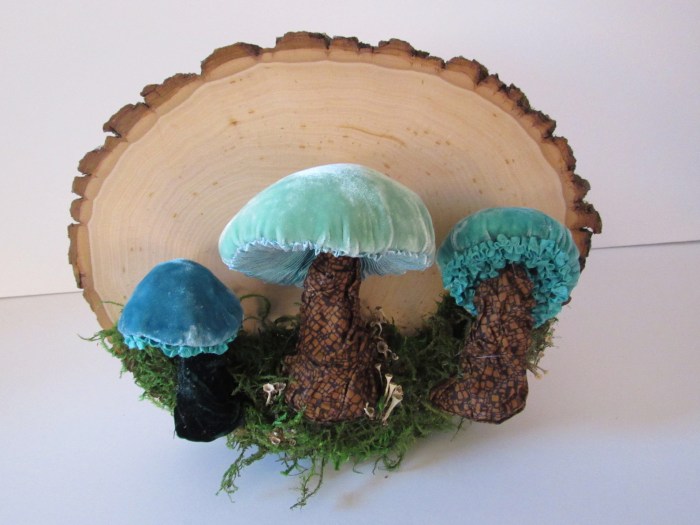
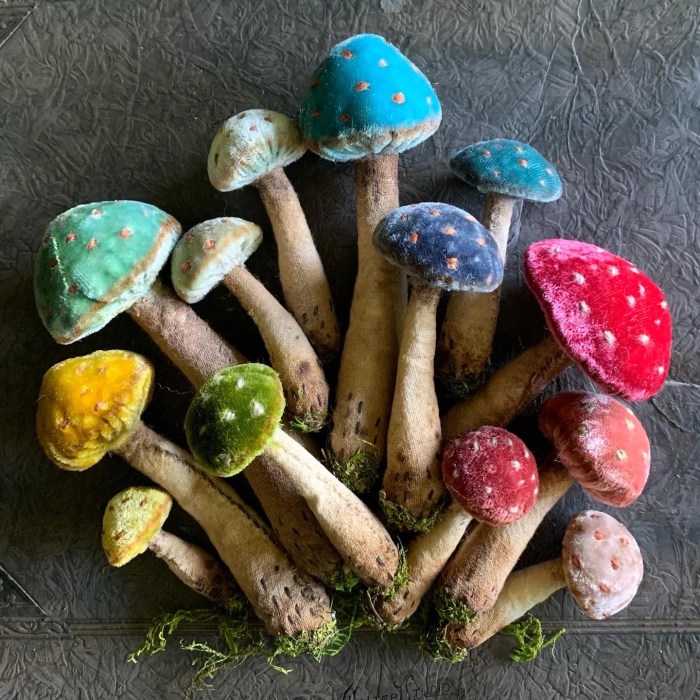
How To Make Your Own Velvet Mushrooms For Decorations: Transform ordinary materials into enchanting, velvety fungal friends! This guide dives deep into the art of crafting realistic-looking velvet mushrooms, perfect for adding a touch of whimsical charm to your home décor. We’ll cover everything from sourcing materials and shaping techniques to mastering color application and adding those final, realistic details that truly bring your creations to life.
Prepare to unleash your creativity and embark on a crafting adventure that’s as rewarding as it is fun.
From choosing the right fabrics and paints to perfecting the subtle curves of a mushroom cap, this comprehensive tutorial provides clear, step-by-step instructions, accompanied by helpful tips and tricks for overcoming common challenges. Whether you’re a seasoned crafter or a curious beginner, you’ll find this guide an invaluable resource for creating stunning velvet mushroom decorations.
Applying Velvet Texture and Color

Achieving a realistic and visually appealing velvet mushroom requires careful consideration of both texture and color application. The methods described below offer diverse approaches to creating convincing depth and dimension in your decorative fungi. Experimentation is key to finding the technique that best suits your style and materials.
Several methods can be employed to create the characteristic velvety texture of a mushroom. The choice of method often depends on the base material used for the mushroom form. Fabric choices significantly influence the final look and feel, while painting techniques provide a more adaptable approach for various substrates.
Velvet Texture Application Methods
Creating a velvety texture on your mushroom forms involves selecting the right materials and applying them skillfully. Using velvet fabric directly offers the most authentic feel, while painting techniques allow for more control over texture and color blending.
Using velvet fabric is the simplest method for achieving a truly velvety texture. Cut pieces of velvet in various shades to match your chosen color palette, and carefully adhere them to your mushroom forms using fabric glue or a strong adhesive suitable for the base material. Consider using different nap lengths for added textural interest. For example, a longer pile velvet could be used for the cap and a shorter pile for the stem, creating subtle variations in texture.
Alternatively, painting techniques using specialized paints or layering techniques can effectively mimic the velvet texture. Experiment with different brushstrokes and paint types to achieve the desired effect.
Color Application Techniques for Realistic Shading and Highlights
Realistic shading and highlighting are crucial for creating lifelike velvet mushrooms. Careful application of color enhances the three-dimensional effect and adds depth to the piece. Observe real mushrooms to understand how light interacts with their surfaces.
Start by applying a base coat of your chosen mushroom color. Allow it to dry completely before moving on to shading and highlighting. Use darker shades to create shadows in the crevices and folds of the mushroom’s cap and stem. Apply lighter shades to the areas where light would naturally hit, such as the top of the cap and the edges of the stem.
Use a dry brushing technique with a very light shade to add subtle highlights. This involves lightly dragging a dry brush across the surface, leaving only a hint of color. Blending is essential; use a soft brush or sponge to seamlessly transition between shades, avoiding harsh lines. The goal is to create a smooth, gradual change in color that mimics the natural variations in light and shadow.
Visual Guide: Three Velvet Mushroom Color Palettes
Three diverse color palettes offer starting points for your mushroom creations. Remember that these are merely suggestions; feel free to adapt them to your preferences.
The first palette focuses on earthy tones. A base coat of deep brown is applied to the entire mushroom. Subtle shading is achieved using burnt umber and dark sepia, concentrating these darker shades in the crevices of the cap and along the stem’s base. Highlights are created with a light beige or tan, subtly applied to the cap’s upper surface and the edges of the stem.
The second palette explores vibrant autumnal hues. A base coat of rusty orange is applied. Darker shades of burnt orange and deep red are used for shading, emphasizing the cap’s curvature. Highlights are added with a pale yellow-orange, concentrating on the areas that would receive direct sunlight.
The third palette opts for a more whimsical approach. A base coat of soft lavender is applied. Subtle shading is achieved using a muted purple and a very light grey. Highlights are added using a pale lilac, focusing on the edges and the top of the cap. This palette lends itself well to creating a fantastical or fairy-tale-inspired mushroom.
Adding Finishing Touches and Details: How To Make Your Own Velvet Mushrooms For Decorations

Elevating your handcrafted velvet mushrooms from charming crafts to realistic decorative pieces requires attention to detail. The final touches significantly impact the overall aesthetic appeal, transforming them from simple shapes into captivating fungal imitations. By adding subtle imperfections and carefully considering the finish, you can achieve a level of realism that will impress.Adding fine details such as spots, blemishes, or imperfections is crucial for enhancing the realism of your velvet mushrooms.
These minute additions mimic the natural variations found in real mushrooms, preventing a uniform, artificial look. A truly convincing mushroom will showcase a degree of organic irregularity.
Adding Spots and Blemishes, How To Make Your Own Velvet Mushrooms For Decorations
Creating realistic spots and blemishes can be achieved using a variety of techniques. For example, you can use a fine-tipped paintbrush to apply small dots of a slightly darker shade of your base color to simulate age spots or discoloration. Alternatively, a diluted acrylic wash can be dabbed onto the surface to create a more subtle, mottled effect. Experiment with different colors and techniques to find what works best for your desired level of realism.
Remember that less is often more – a few strategically placed imperfections are far more effective than an overabundance of blemishes. For a truly authentic touch, consider incorporating variations in texture, creating slightly raised or indented areas to mimic natural irregularities. A toothpick or similar tool can be used to carefully sculpt these minute variations in the velvet surface.
Achieving a Glossy or Matte Finish
The final finish significantly contributes to the overall visual impact of your velvet mushrooms. A glossy finish can create a wet, vibrant appearance, while a matte finish offers a more subdued, earthy feel. To achieve a glossy finish, a thin coat of high-gloss varnish or sealant can be applied carefully using a small brush or sponge. Ensure the varnish is specifically designed for use on fabric or velvet to avoid damage or discoloration.
Allow ample drying time between coats to prevent streaking or clumping. For a matte finish, consider using a matte varnish or sealant, or lightly dusting the finished mushrooms with a fine-grit powder, such as talcum powder, to subtly dull the shine. The choice between a glossy and matte finish is largely a matter of personal preference and the desired aesthetic.
Creating a Display Stand or Base
A thoughtfully designed display stand can significantly enhance the presentation of your velvet mushrooms. A simple yet effective option is a small, circular base made from a sturdy material such as wood or a heavy-duty cardboard. The base could be painted a complementary color or decorated with moss or small twigs to further enhance the natural aesthetic. For a more elaborate display, consider a tiered stand made from repurposed materials such as driftwood or branches.
This design could accommodate multiple mushrooms of varying sizes and colors, creating a visually stunning centerpiece. Imagine a three-tiered stand crafted from a naturally curved branch, with each tier showcasing a cluster of mushrooms, varying in size and shade, arranged to simulate a natural mushroom patch. The base could be decorated with a bed of artificial moss or lichen to create a cohesive and immersive display.
Creating your own velvet mushrooms is a rewarding journey of artistic expression and crafting skill. By following this guide, you’ve unlocked the potential to transform simple materials into unique, beautiful decorations. Experiment with different colors, textures, and sizes to create your own unique mushroom forest, showcasing your individual style and creativity. So, gather your supplies, unleash your imagination, and enjoy the process of bringing these charming fungal friends to life.
The possibilities are as limitless as your creativity!