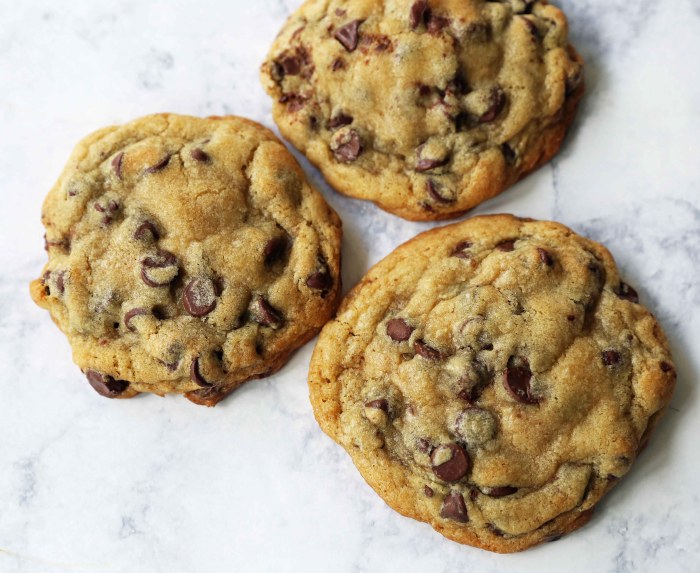
Decorated Chocolate Cip Cookies – Decorated Chocolate Chip Cookies: More than just a classic treat, they’re a canvas for creativity. This guide delves into the art of transforming simple chocolate chip cookies into edible masterpieces. We’ll explore diverse recipes, innovative decorating techniques, and the science behind achieving the perfect texture and taste, ensuring your cookies are as delicious as they are visually stunning.
Prepare to elevate your baking game to new heights!
From minimalist elegance to whimsical designs, we’ll cover a range of decorating styles, providing step-by-step instructions and helpful tips for bakers of all skill levels. Discover how different ingredients, from chocolate types to flours, impact the final product, and learn how to maximize the shelf life of your creations. Get ready to unleash your inner artist and create cookies that are as delightful to look at as they are to eat.
Recipe Variations

Decorated chocolate chip cookies offer a delightful canvas for creativity. The base recipe can be easily adapted to create cookies of varying complexity, catering to different skill levels and aesthetic preferences. The following recipes demonstrate this versatility, progressing from simple to more intricate designs.
Simple Sprinkle Cookies
This recipe is perfect for beginners, requiring minimal decorating skills and readily available ingredients. The focus is on creating a visually appealing cookie with a straightforward decorating technique.
Ingredients:
- 1 cup (2 sticks) unsalted butter, softened
- ¾ cup granulated sugar
- ¾ cup packed brown sugar
- 2 teaspoons pure vanilla extract
- 2 large eggs
- 2 ¼ cups all-purpose flour
- 1 teaspoon baking soda
- 1 teaspoon salt
- 2 cups chocolate chips
- Various sprinkles (rainbow, chocolate, etc.)
Instructions:
- Preheat oven to 375°F (190°C).
- Cream together butter and sugars until light and fluffy.
- Beat in eggs one at a time, then stir in vanilla.
- Combine flour, baking soda, and salt; gradually add to the wet ingredients.
- Stir in chocolate chips.
- Drop by rounded tablespoons onto ungreased baking sheets.
- Bake for 9-11 minutes, or until edges are nicely browned.
- Immediately sprinkle generously with sprinkles.
- Let cool on baking sheets for a few minutes before transferring to a wire rack to cool completely.
Royal Icing Decorated Cookies
This recipe introduces a more advanced decorating technique using royal icing, allowing for intricate designs and personalized messages. The cookie dough remains simple, allowing the decoration to take center stage.
Ingredients:
- (Use the same cookie dough recipe as above)
- Royal Icing: 3 cups powdered sugar, 3-4 tablespoons meringue powder, 6-8 tablespoons water, gel food coloring (various colors)
Instructions:
- Bake cookies according to the simple sprinkle cookie recipe.
- Prepare royal icing: Whisk together powdered sugar and meringue powder. Gradually add water until desired consistency is reached (pipeable).
- Divide icing into separate bowls and tint with gel food coloring.
- Use various piping tips to create designs on the cooled cookies. Examples include Artikels, borders, flowers, and lettering.
- Allow icing to dry completely before handling or stacking.
Chocolate Ganache and Fresh Fruit Decorated Cookies
This recipe combines the rich flavor of chocolate ganache with the freshness of fruit for an elegant and sophisticated treat. The focus is on creating a visually stunning cookie with a luxurious texture.
Ingredients:
- (Use the same cookie dough recipe as above, but consider adding 1/2 cup cocoa powder to the dough for a deeper chocolate flavor)
- Chocolate Ganache: 1 cup heavy cream, 8 ounces semi-sweet chocolate, finely chopped
- Assorted fresh fruit (berries, sliced kiwi, etc.), cut into small pieces
Instructions:
- Bake cookies according to the simple sprinkle cookie recipe, but bake slightly longer for a crispier cookie.
- Prepare chocolate ganache: Heat heavy cream in a saucepan until simmering. Pour over chopped chocolate and let sit for a few minutes. Whisk until smooth and glossy.
- Once the cookies have cooled completely, drizzle ganache over the top.
- Arrange fresh fruit pieces on top of the ganache.
- Refrigerate for at least 30 minutes to allow the ganache to set.
Visual Appeal and Presentation: Decorated Chocolate Cip Cookies

The visual appeal of decorated chocolate chip cookies is paramount to their overall success. A beautifully presented cookie is more likely to be chosen, enjoyed, and remembered, impacting everything from personal enjoyment to sales in a commercial setting. The interplay of color, texture, and shape significantly influences the aesthetic impact, creating a sensory experience that extends beyond the simple act of eating.The strategic use of color, texture, and shape dramatically enhances the visual appeal of decorated chocolate chip cookies.
Color choices evoke emotions and associations; vibrant hues create a festive mood, while more muted tones suggest sophistication. Texture adds depth and visual interest—a smooth, glossy icing contrasts beautifully with the rough edges of a cookie, creating a dynamic visual. Shape, beyond the classic round, allows for creativity and customization, from whimsical animals to intricate geometric patterns.
Careful consideration of these elements elevates a simple cookie into a miniature work of art.
Creative Cookie Arrangements for Various Occasions
Creative cookie arrangements significantly enhance the overall presentation and enjoyment of decorated chocolate chip cookies. The arrangement should reflect the occasion and the intended audience, adding a layer of personalization and thoughtfulness. A thoughtfully arranged platter becomes a centerpiece, drawing attention and sparking conversation.
- Holiday Celebrations: For Christmas, cookies could be arranged in the shape of a Christmas tree, using varying colors and sizes to mimic ornaments. A Halloween arrangement might feature cookies shaped like ghosts, pumpkins, and bats, scattered across a platter with orange and purple accents.
- Birthday Parties: Cookies could be arranged in the shape of the number representing the birthday, or arranged around a central birthday candle-shaped cookie. Using bright, celebratory colors and festive sprinkles would further enhance the visual appeal.
- Weddings: Elegant arrangements could feature cookies in shades of white, ivory, and gold, perhaps with delicate floral designs. They could be arranged on a tiered stand or in a heart shape, reflecting the romantic theme.
- Corporate Events: Cookies could be arranged in a logo shape or in company colors, creating a unique and memorable takeaway for attendees. This offers a sophisticated and branded experience.
A Visually Descriptive Paragraph Detailing a Beautifully Decorated Cookie Platter, Decorated Chocolate Cip Cookies
Imagine a rustic wooden platter laden with a breathtaking array of decorated chocolate chip cookies. A symphony of colors dances across the surface: deep emerald green cookies adorned with delicate white snowflakes sit beside vibrant ruby red cookies shaped like hearts, each meticulously piped with swirling white icing. Golden-brown cookies, speckled with dark chocolate chips and drizzled with shimmering gold, nestle amongst them.
The textures are equally diverse; some cookies boast a smooth, glossy finish, while others exhibit a rustic, slightly cracked surface, adding depth and visual interest. The overall arrangement is not rigidly structured but rather artfully composed, with cookies of varying shapes and sizes creating a visually captivating mosaic. The platter is a feast for the eyes, a testament to the artistry and skill involved in creating these miniature edible masterpieces.
Creative Decorating Ideas
Elevating your chocolate chip cookies beyond the classic involves exploring creative decorating techniques that enhance both visual appeal and flavor profiles. The following ideas showcase innovative approaches to transforming simple cookies into edible works of art, suitable for various occasions and skill levels. Each design offers a unique opportunity to personalize your cookies, making them truly special.
Geometric Designs with Royal Icing
Royal icing provides a sturdy, crisp canvas for intricate designs. This method is ideal for creating geometric patterns, like tessellations or mandalas, adding a sophisticated touch to your cookies.
- Materials: Royal icing (prepared with meringue powder for optimal consistency), various piping tips (small round, star, etc.), food coloring gels, parchment paper, and a scribe or toothpick for design transfer.
- Process: Artikel the desired geometric design onto the cooled cookie using a thin layer of royal icing. Allow this to set slightly. Then, fill in the sections with different colored icing using appropriate piping tips. Use a scribe or toothpick to create fine details or textures within the design. You can incorporate seasonal colors, like deep reds and greens for Christmas or bright yellows and oranges for autumn.
- Personalization: Add initials, dates, or short messages using a fine-tipped piping bag filled with royal icing.
Ombre Effect with Colored Chocolate Drizzle
Achieving a visually stunning ombre effect is surprisingly simple and adds a touch of elegance to your cookies. This technique uses melted chocolate in varying shades to create a gradient effect.
- Materials: High-quality chocolate (dark, milk, and white), food coloring gels, parchment paper, piping bags or squeeze bottles.
- Process: Melt the chocolate separately, adding food coloring to achieve different shades of the same color (e.g., light pink to dark pink). Transfer the melted chocolate into separate piping bags or squeeze bottles. Drizzle the darkest shade onto the cooled cookies first, followed by progressively lighter shades, creating a smooth gradient. You can create seasonal variations by using colors like pastel shades for spring or deep jewel tones for fall.
- Personalization: Write a short message or add small sprinkles to complement the ombre effect. For birthdays, a gradient from a person’s favorite color to white can be a unique touch.
Textured Surfaces with Sprinkles and Edible Glitter
Adding texture through sprinkles and edible glitter elevates the visual interest of your cookies. This is a simple technique suitable for all skill levels, and the results are always delightful.
- Materials: Various sprinkles (jimmies, nonpareils, sanding sugars), edible glitter, edible glue or melted white chocolate.
- Process: Apply a thin layer of edible glue or melted white chocolate to the cooled cookies. Immediately sprinkle generously with your chosen sprinkles and glitter. Tap off any excess. For seasonal themes, use sprinkles in festive colors, such as red and green for Christmas or orange and black for Halloween.
- Personalization: Create personalized designs by arranging sprinkles into specific patterns or using glitter to Artikel shapes or initials.
Stenciled Designs with Cocoa Powder
This technique allows for the creation of crisp, clean designs using stencils and cocoa powder. It’s a low-mess option that yields sophisticated results.
- Materials: Cookie stencils (available online or easily made from cardstock), cocoa powder, a fine-mesh sieve or shaker.
- Process: Place the stencil on top of the cooled cookie. Using a fine-mesh sieve or shaker, gently dust cocoa powder over the stencil, ensuring even coverage. Carefully remove the stencil to reveal the design. This can be adapted for seasonal themes by using colored cocoa powders or incorporating other spices, such as cinnamon or nutmeg.
- Personalization: Create personalized designs by using custom-made stencils with initials, names, or simple shapes. Combine this with other decorating techniques, like a chocolate drizzle, for a more elaborate design.
3D Cookie Art with Modeling Chocolate
For those with more advanced skills, modeling chocolate offers the possibility of creating intricate 3D elements. This allows for the creation of miniature figurines, flowers, or other decorative elements.
- Materials: Modeling chocolate (available in various colors), cookie cutters, sculpting tools, edible glue.
- Process: Knead the modeling chocolate until soft and pliable. Use cookie cutters to create shapes or sculpt freehand using your fingers and sculpting tools. Attach the elements to the cooled cookies using edible glue. Seasonal themes can be easily incorporated by creating miniature figures or decorations relevant to the time of year (e.g., Santa Claus for Christmas, pumpkins for Halloween).
- Personalization: Create personalized elements such as miniature figures representing the recipient or small logos of their favorite things.
Mastering the art of decorated chocolate chip cookies is a journey of experimentation and self-expression. This guide has equipped you with the recipes, techniques, and knowledge to create stunning, delicious cookies for any occasion. Remember, the most important ingredient is your creativity! So, gather your supplies, unleash your imagination, and embark on a delightful baking adventure. The possibilities are as endless as your creativity allows.