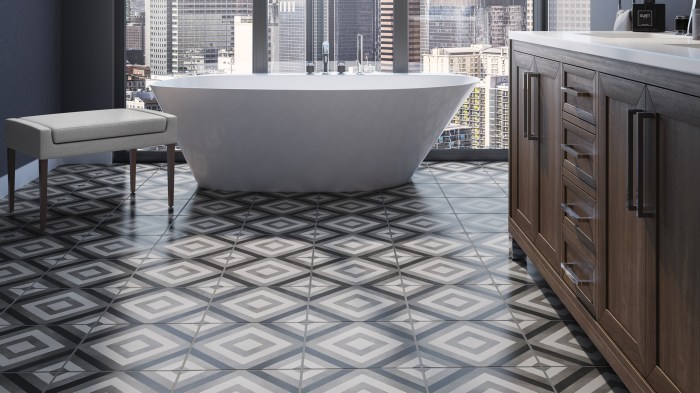
Decorative Floor Tile transforms ordinary spaces into extraordinary havens. From the intricate mosaics of a Moroccan riad to the sleek minimalism of a modern loft, tiles offer unparalleled versatility in design. This guide delves into the diverse world of decorative floor tiles, exploring various materials, installation techniques, and styling options to help you create the floor of your dreams.
We’ll cover everything from selecting the perfect tile type to mastering the art of grout application, ensuring your project is both beautiful and long-lasting.
We will examine the manufacturing processes of popular tile materials like ceramic, porcelain, and natural stone, comparing their durability, maintenance needs, and price points. We’ll then explore design techniques, demonstrating how to use tile shape, size, and pattern to create stunning focal points and visually appealing layouts. Finally, we’ll provide a practical guide to installation, including subfloor preparation, cutting techniques, and troubleshooting common problems.
Installation and Care of Decorative Floor Tiles

Installing decorative floor tiles can dramatically enhance the aesthetic appeal of any space, but achieving a professional-looking result requires careful planning and execution. From subfloor preparation to grouting and sealing, each step plays a crucial role in the longevity and beauty of your tiled floor. This section details the essential processes involved in successful tile installation and ongoing maintenance.
Subfloor Preparation for Tile Installation
A properly prepared subfloor is the foundation of a successful tile installation. Unevenness, cracks, or debris can lead to tile cracking, shifting, and ultimately, failure. The process typically involves several steps. First, remove any existing flooring and thoroughly clean the subfloor, removing dust, debris, and old adhesive. Next, assess the subfloor for levelness using a long level.
Significant imperfections may require patching with self-leveling compound, ensuring a smooth, even surface. For wooden subfloors, ensure they are adequately stable and free from squeaks or movement. Cracks or gaps should be repaired with appropriate wood filler. Finally, prime the subfloor with a suitable primer to enhance adhesion and prevent moisture penetration. This preparation guarantees a stable and durable base for your decorative tiles.
Cutting and Installing Decorative Tiles
Cutting decorative tiles requires precision to maintain the integrity of intricate patterns and designs. A wet saw is ideal for precise cuts, particularly for intricate shapes. For smaller cuts or adjustments, tile nippers or a manual scoring tool can be effective. When installing tiles, begin at a central point and work outwards, ensuring consistent spacing between tiles using spacers.
For intricate patterns, carefully plan the layout beforehand, creating a detailed diagram if necessary. This ensures that the pattern flows seamlessly across the floor. Use a thin-set mortar appropriate for the type of tile and subfloor, applying it evenly to the back of each tile before placing it in position. Maintain consistent pressure to ensure proper adhesion.
For larger tiles, consider using a tile leveling system to maintain evenness and prevent lippage.
Grouting and Sealing Decorative Floor Tiles
Once the tiles are set, the next step involves grouting. Choose a grout color that complements the tiles and the overall design aesthetic. Apply the grout using a rubber grout float, working it into the joints between the tiles at a 45-degree angle. Remove excess grout immediately with a damp sponge, ensuring that the grout lines remain clean and consistent.
Allow the grout to cure completely according to the manufacturer’s instructions. Finally, seal the grout to protect it from staining and moisture damage. Apply a grout sealer according to the manufacturer’s instructions, ensuring even coverage. This process protects the grout and enhances the longevity of your decorative tile installation.
Common Problems During Tile Installation and Their Solutions, Decorative Floor Tile
Proper planning and execution are vital for a successful tile installation. However, certain challenges may arise.
- Uneven Tile Surface: This often results from an improperly prepared subfloor. Solution: Ensure a level subfloor before installation using self-leveling compound.
- Cracked Tiles: This can be caused by excessive force during installation or poor subfloor preparation. Solution: Use appropriate cutting techniques and ensure a stable subfloor.
- Lippage (Uneven Tile Heights): This affects the overall look and can cause tripping hazards. Solution: Use tile leveling systems to maintain consistent tile heights.
- Grout Discoloration: This can be due to improper sealing or using the wrong type of grout. Solution: Apply a high-quality grout sealer and use a grout appropriate for the environment.
- Hollow Tiles: This happens when tiles aren’t fully adhered to the subfloor. Solution: Use appropriate thin-set mortar and apply even pressure during installation.
Ultimately, choosing and installing decorative floor tiles is a journey of creativity and precision. By understanding the diverse range of materials, mastering installation techniques, and embracing thoughtful design principles, you can transform any space. This guide provides a comprehensive foundation, empowering you to confidently embark on your next tiling project and create a floor that is as unique and stylish as you are.
Remember to consider your personal style, the room’s function, and the long-term maintenance requirements when making your selection. The result? A stunning floor that elevates your home’s aesthetic appeal for years to come.