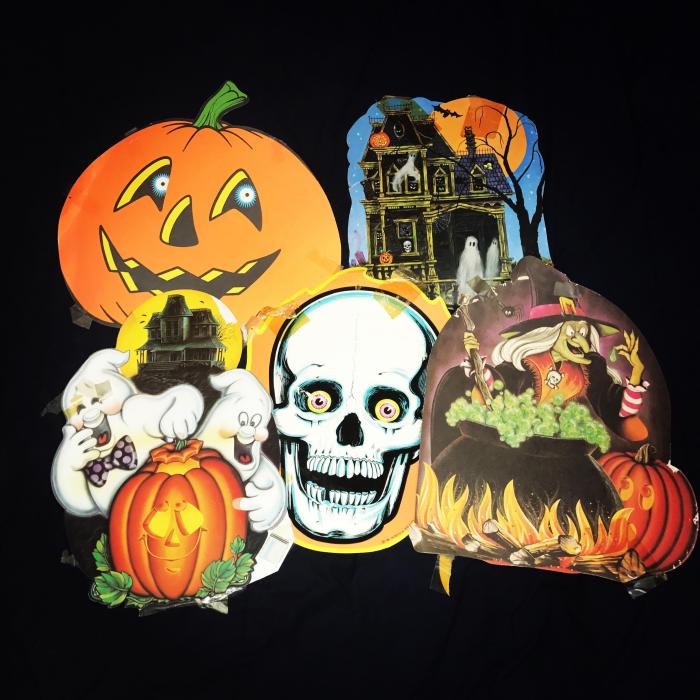
Halloween Vintage Decorations: Step back in time and conjure a hauntingly beautiful Halloween with this guide. We’ll explore the evolution of vintage Halloween aesthetics, from the gothic elegance of the 1920s to the whimsical charm of the 1950s and beyond. Discover unique DIY projects, repurposing ideas, and thematic display suggestions to create a truly unforgettable Halloween experience, steeped in retro style.
This exploration delves into the captivating world of vintage Halloween decorations, examining distinct styles, material evolution across decades, and the artistry of crafting and displaying these unique pieces. We’ll uncover the secrets to creating a cohesive vintage aesthetic, blending handmade and repurposed elements for a truly unforgettable Halloween celebration.
Crafting Vintage-Inspired Halloween Decorations: Halloween Vintage Decorations

Creating a vintage Halloween aesthetic involves blending nostalgic charm with spooky elements. This can be achieved through careful selection of colors, textures, and materials, evoking a sense of timelessness and classic Halloween imagery. By repurposing old items and crafting unique decorations, you can personalize your Halloween décor and add a unique touch to your home.
DIY Vintage Halloween Decorations
This section details three simple yet effective DIY projects for crafting vintage Halloween decorations using readily available materials. These projects are designed to be accessible to all skill levels, allowing you to create unique and charming decorations for your Halloween celebration.
- Project 1: Lace and Burlap Ghosts
- Materials: Burlap fabric scraps, white lace trim, black embroidery thread, small pebbles or rice for weighting, hot glue gun.
- Procedure: Cut out ghost shapes from burlap. Glue lace trim around the edges of the ghosts. Embroider simple facial features using black thread. Fill the bottom of each ghost with pebbles or rice to give it weight and help it stand.
- Project 2: Mason Jar Lanterns
- Materials: Mason jars, battery-operated tea lights, black paint, stencils (optional), twine or ribbon.
- Procedure: Clean the mason jars thoroughly. Paint the jars black, using stencils to add spooky designs if desired. Once dry, place a battery-operated tea light inside each jar. Tie twine or ribbon around the neck of the jar for added decoration.
- Project 3: Vintage-Style Halloween Banner
- Materials: Burlap or hessian fabric, vintage-style Halloween alphabet stamps or stencils, black fabric paint, twine or ribbon.
- Procedure: Cut burlap into strips for the banner. Use stamps or stencils to paint Halloween-themed words or phrases onto the burlap strips. Let the paint dry completely. Sew or glue the strips together, leaving space between them. Attach twine or ribbon to the top for hanging.
Repurposing Vintage Items for Halloween Decorations
Repurposing vintage items is a fantastic way to add a unique and authentic vintage touch to your Halloween décor. The following examples highlight how to transform existing items into spooky decorations.
- Old Books: Create spooky silhouettes by cutting out bat, cat, or witch shapes from the pages of old books. The aged texture and yellowed pages add a dramatic, antique effect. Consider color variations of brown, cream, and black. The form should be flat and the texture rough.
- Teacups and Saucers: Transform mismatched teacups and saucers into miniature haunted scenes. Fill the cups with miniature plastic spiders and cobwebs, creating a creepy yet charming display. The colors might include pastel shades with hints of black, and the texture should be delicate and slightly chipped.
- Dolls: Give old dolls a spooky makeover with tattered clothing, cobwebs, and eerie makeup. Their form will be slightly unsettling, with the texture of old fabric and painted faces. Colors can range from faded pastels to deep blacks and grays.
- Suitcases: Use vintage suitcases as spooky containers. Fill them with faux cobwebs, plastic spiders, and other Halloween paraphernalia. The form is rectangular and boxy, while the texture depends on the suitcase material (leather, wood, etc.), offering a vintage and sturdy feel. The colors will likely be muted browns, blacks, or faded blues.
- Picture Frames: Place vintage Halloween postcards or creepy photos inside old picture frames. The texture would be wood or possibly metal, with a distressed finish for an aged look. Colors can be dark and muted, focusing on the aged effect of the frame and the imagery within.
Creating a Cohesive Vintage Halloween Aesthetic, Halloween Vintage Decorations
Achieving a cohesive vintage Halloween aesthetic requires careful consideration of color palettes, textures, and the overall visual narrative. A color scheme of muted blacks, deep purples, rusty oranges, and creamy whites will evoke a sense of age and mystery. Combining handmade burlap ghosts with repurposed teacups and aged picture frames creates a layered and visually interesting display. The overall effect should be a slightly eerie yet charming atmosphere, reminiscent of classic Halloween imagery from a bygone era.
The combination of rough textures (burlap) with delicate textures (lace, china) adds depth and visual interest. The muted color palette prevents the scene from being overly bright or jarring, maintaining the desired vintage aesthetic.
From gothic grandeur to whimsical charm, creating a vintage Halloween atmosphere is an enchanting journey. By understanding the evolution of styles, mastering DIY techniques, and thoughtfully arranging your decorations, you can craft a truly memorable and uniquely stylish Halloween celebration. Let the spooky spirit of yesteryear inspire your hauntingly beautiful display this year!