Wood Wall Decor transforms ordinary spaces into extraordinary havens. From rustic charm to modern minimalism, the versatility of wood allows for endless creative expression. This comprehensive guide delves into the diverse world of wood wall decor, exploring various types, materials, design aesthetics, placement techniques, and maintenance tips. Whether you’re a seasoned DIY enthusiast or a design novice, discover how to select, install, and care for wood wall art to perfectly complement your personal style and home environment.
We’ll cover everything from selecting the right wood type and finish to mastering different arrangement techniques and creating stunning DIY projects. Learn how to incorporate wood wall decor into various rooms, maximizing its visual impact and creating a space that truly reflects your personality.
Materials and Finishes

The choice of wood and finish significantly impacts the aesthetic and longevity of your wood wall decor. Understanding the properties of different wood types and the effects of various finishes is crucial for creating a piece that is both beautiful and durable. This section explores common wood types, popular finishes, and provides design examples showcasing the versatility of wood in wall decor.
Wood Type Comparison
Selecting the right wood is paramount. Different species offer unique characteristics influencing durability, grain patterns, and ultimately, cost. Hardwoods generally boast superior durability and intricate grain patterns compared to softwoods, but come at a higher price.
| Wood Type | Durability | Grain Pattern | Cost (Relative) |
|---|---|---|---|
| Oak | High | Prominent, varied | High |
| Walnut | High | Rich, often dark | High |
| Maple | Medium-High | Fine, even | Medium |
| Pine | Medium | Visible knots, less defined | Low |
| Birch | Medium | Fine, even, sometimes with flecks | Medium |
Wood Finish Options
The finish applied to the wood profoundly affects its appearance, protection, and feel. Each finish offers unique properties and aesthetic outcomes.
- Stained Wood: Staining enhances the natural wood grain, adding depth and color variation. Oil-based stains penetrate deeper, providing richer color and better protection. Water-based stains are easier to clean up but offer less depth of color.
- Painted Wood: Painting offers a completely different aesthetic, masking the natural wood grain and allowing for vibrant colors and custom designs. Multiple coats are usually required for a smooth, even finish.
- Lacquered Wood: Lacquering provides a high-gloss, protective finish that is resistant to scratches and moisture. It enhances the wood’s natural beauty or complements paint beautifully.
- Varnished Wood: Varnishing creates a protective layer, enhancing the wood’s natural appearance with a subtle sheen. It offers less protection than lacquer but allows the wood grain to show through more clearly.
Design Examples, Wood Wall Decor
Combining different wood types and finishes allows for diverse and striking designs. Below are three examples illustrating this versatility.
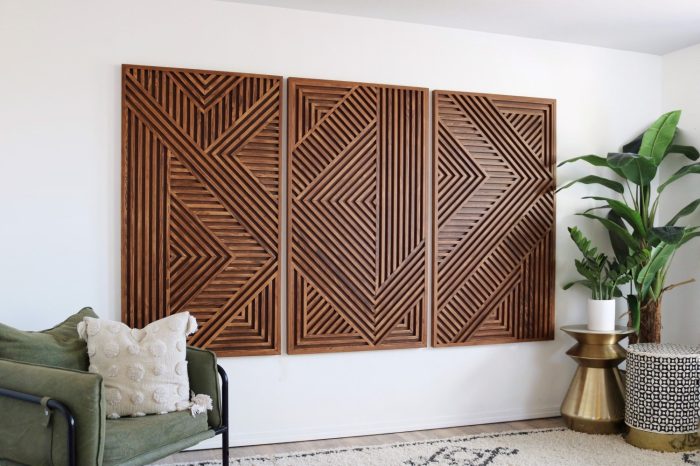
- Modern Geometric Wall Art: This piece uses contrasting dark walnut and light maple. Thin strips of walnut are arranged in a geometric pattern on a maple backing. The walnut is finished with a clear lacquer for a high-gloss finish, while the maple is stained a light honey color. The contrast in color and sheen creates a visually striking effect.
- Rustic Floating Shelf: A single, thick slab of reclaimed pine forms the shelf. The pine’s natural imperfections and knots are preserved, emphasizing its rustic charm. The finish is a clear varnish, enhancing the wood’s natural color and texture. This piece adds a touch of natural warmth to any room.
- Abstract Panel: This piece uses a combination of painted and stained wood. A background of painted white birch is overlaid with irregular shapes of stained oak, creating an abstract design. The oak is stained a deep espresso color, providing a strong contrast against the white background. The entire piece is sealed with a matte lacquer for durability.
Placement and Arrangement

Strategic placement and thoughtful arrangement of wood wall decor significantly impact a room’s overall aesthetic. The right approach can transform a space from ordinary to extraordinary, highlighting the beauty of the wood and enhancing the room’s design. Consider the size, shape, and style of your decor, as well as the existing room elements, to achieve the most visually appealing result.
Effective placement considers several factors to ensure the wood wall decor becomes a focal point, complementing rather than clashing with the existing décor. Proper arrangement creates a cohesive and balanced look, enhancing the visual impact of the pieces.
Placement Guidelines for Maximizing Visual Impact
The following guidelines offer practical advice for optimally placing your wood wall decor to achieve the desired visual effect. Proper placement can make a substantial difference in how the pieces are perceived and how they contribute to the overall room design.
- Consider the Scale of the Decor: Larger pieces generally work well in larger spaces, acting as statement pieces. Smaller pieces can be used to fill smaller areas or to complement larger ones.
- Balance with Existing Furniture: Avoid placing wood wall decor directly above oversized furniture, as this can visually overwhelm the piece. Instead, find a balanced relationship between the size of the decor and the furniture below.
- Height and Placement: Hang artwork at eye level or slightly above, ensuring it’s visible without requiring excessive head tilting. Consider the focal point of the room and position the decor to enhance it.
- Use Negative Space Effectively: Don’t overcrowd a wall. Allow for sufficient negative space around the wood decor to prevent a cluttered look. This negative space creates visual breathing room and highlights the individual pieces.
- Think About the Room’s Purpose: In a dining room, consider placing wood wall decor above a buffet or sideboard. In a living room, it might be above a fireplace or sofa.
Arrangement Techniques for Multiple Pieces
Arranging multiple wood wall decor pieces requires a thoughtful approach to create a visually pleasing and cohesive display. Different techniques offer diverse aesthetic outcomes, each with its own strengths and considerations.
- Symmetrical Arrangement: This creates a formal and balanced look. Identical or nearly identical pieces are arranged in a mirrored fashion on either side of a central point, such as a fireplace or window.
- Asymmetrical Arrangement: This provides a more casual and dynamic feel. Pieces of varying sizes and shapes are arranged to create visual interest without strict symmetry. The key is to maintain a sense of balance despite the asymmetry.
- Gallery Wall Arrangement: This involves grouping multiple pieces of varying sizes and styles together to create a curated collection. This can range from a tightly packed arrangement to a more loosely organized display, depending on the desired effect. Consider using a consistent theme or color palette to unify the pieces.
Lighting to Enhance Wood Wall Decor
Appropriate lighting can dramatically enhance the beauty and texture of wood wall decor. The type and placement of lighting should be carefully considered to highlight the wood’s grain and color, creating a warm and inviting atmosphere.
- Recessed Lighting: Provides even, general illumination, preventing harsh shadows and showcasing the wood’s overall appearance. Placement should be strategic to avoid direct glare on the wood.
- Track Lighting: Offers adjustable focus, allowing you to highlight specific pieces or areas of the wood decor. This is particularly effective for gallery walls or displays with multiple pieces.
- Accent Lighting: Using spotlights or picture lights directly on the wood wall decor enhances its texture and depth. Warm-toned light (2700K-3000K) complements the natural tones of wood particularly well.
- Avoid Harsh Overhead Lighting: Direct, bright overhead lighting can wash out the wood’s color and texture, diminishing its visual appeal. Soft, diffused lighting is generally preferable.
Care and Maintenance

Preserving the beauty and longevity of your wood wall decor requires understanding the specific needs of different wood types and finishes. Proper care prevents damage and ensures your pieces remain stunning focal points in your home for years to come. This section details cleaning methods, common issues, and preventative measures to keep your wood wall art looking its best.
Cleaning and Maintaining Different Wood Types
The best cleaning method depends on the wood type and finish. Avoid harsh chemicals and abrasive cleaners which can damage the wood’s surface and finish. Gentle cleaning is key to maintaining the integrity and aesthetic appeal of your wall decor.
| Material | Finish | Cleaning Method | Maintenance Tips |
|---|---|---|---|
| Oak | Polyurethane | Damp cloth with mild soap and water; dry thoroughly. | Regular dusting prevents dirt buildup. Avoid placing near direct sunlight or heat sources. |
| Pine | Wax | Soft, dry cloth; occasional re-waxing as needed. | Avoid excessive moisture. Polish periodically to maintain shine and protect the wax layer. |
| Cherry | Lacquer | Soft cloth slightly dampened with water; avoid harsh cleaners. | Protect from scratches with careful handling. Regularly dust to prevent accumulation of debris. |
| Mahogany | Oil-based finish | Dust regularly with a soft cloth; occasional cleaning with a specialized wood cleaner. | Condition periodically with a high-quality wood oil to maintain its richness and prevent drying. |
Common Issues and Preventative Measures
Several factors can affect the longevity of wood wall decor. Understanding these issues allows for proactive measures to ensure your pieces remain in pristine condition.Warping, cracking, and fading are common problems. Warping often results from exposure to extreme temperature fluctuations or high humidity. Cracking can be caused by dryness, impact damage, or inherent wood weaknesses. Fading is primarily caused by prolonged exposure to direct sunlight.To prevent warping, maintain a stable indoor climate with consistent temperature and humidity levels.
To minimize cracking, avoid placing decor near heat sources or in areas prone to drastic temperature changes. Regular conditioning can also help prevent cracking in drier climates. Protecting your wood art from direct sunlight through strategic placement and the use of UV-filtering curtains will significantly reduce fading.
Longevity of Wood Types and Finishes
The longevity of wood wall decor is influenced by the inherent properties of the wood species and the type of finish applied.Hardwoods like oak and mahogany generally offer greater durability and longevity compared to softwoods such as pine. However, proper care and maintenance are crucial regardless of the wood type. A high-quality finish, such as polyurethane or lacquer, provides excellent protection against moisture, scratches, and UV damage, extending the lifespan of the piece significantly.
Oil-based finishes, while offering a natural look, may require more frequent conditioning to maintain their protective qualities. For example, a well-maintained oak piece with a polyurethane finish can last for generations, while an untreated pine piece might show signs of wear and tear more quickly.
DIY Wood Wall Decor Projects

Unlock your creativity and transform ordinary wood into extraordinary wall art with these simple yet impactful DIY projects. These projects cater to various skill levels, ensuring everyone can participate and enjoy the process of creating unique and personalized home décor. From beginner-friendly designs to more advanced techniques, you’ll find inspiration and guidance to create stunning wood wall art that reflects your personal style.
Simple Wood Wall Decor Project: Geometric Pattern
This project provides a straightforward approach to creating a visually appealing geometric design on a wood panel. It’s perfect for beginners and requires minimal tools and experience.Materials List:
- One piece of wood (e.g., a 12×12 inch square piece of plywood or MDF)
- Pencil
- Ruler
- Sandpaper (fine grit)
- Wood stain or paint (your choice of color)
- Paintbrushes or rags
- Optional: Stencil for more intricate designs
Step-by-Step Guide:
- Sand the wood surface to create a smooth finish.
- Using a ruler and pencil, lightly sketch your chosen geometric pattern onto the wood. Simple shapes like squares, triangles, or diamonds work well.
- Apply your chosen wood stain or paint, carefully following the lines of your design. Multiple coats may be needed for even coverage.
- Allow the paint or stain to dry completely before hanging your artwork.
Beginner, Intermediate, and Advanced DIY Wood Wall Decor Projects
The following projects offer increasing complexity, catering to different skill levels.Beginner: Simple Wooden Sign. This involves staining or painting a piece of wood and adding a simple phrase or design using stencils or freehand painting. The focus is on mastering basic techniques like sanding and applying finishes.Intermediate: Layered Wood Wall Hanging. This project involves cutting multiple shapes from wood (e.g., circles, leaves) in varying sizes and layering them to create a three-dimensional effect.
This introduces more precise cutting and layering techniques. A simple design could be several overlapping circles in different shades of stain.Advanced: Intricate Wood Carving Wall Art. This project requires advanced woodworking skills and involves carving an intricate design into a piece of wood. This demands precision, patience, and experience with wood carving tools. The design could be a detailed floral pattern or an abstract design requiring deep carving and shaping.
Creating Unique Wall Art Using Reclaimed Wood
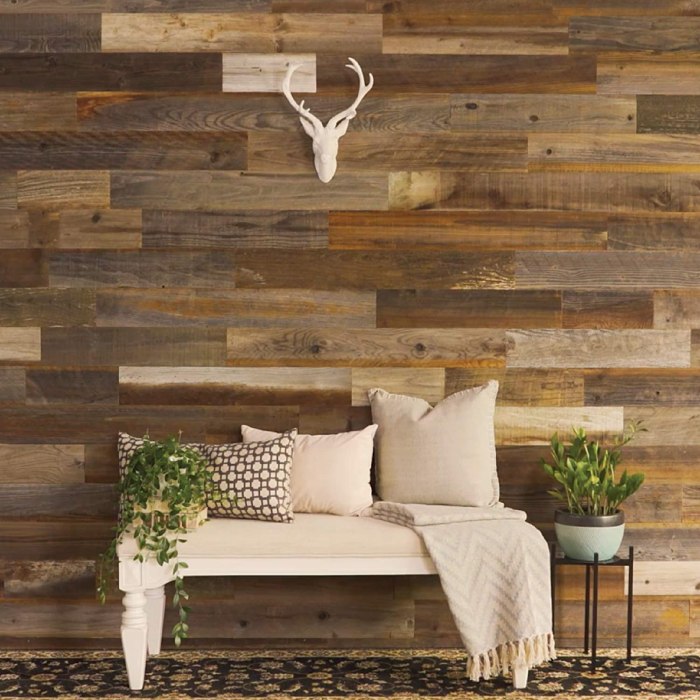
Reclaimed wood offers unique character and texture, making it an ideal material for creating one-of-a-kind wall art. The process involves careful selection, cleaning, and finishing to showcase the wood’s natural beauty.Material Selection: Choose reclaimed wood with interesting grain patterns, knots, and variations in color. Consider the wood’s history and the story it tells. Wood from old barns, pallets, or demolished structures can be repurposed for this project.Process:
- Clean the reclaimed wood thoroughly to remove dirt, debris, and any loose elements.
- Inspect the wood for cracks or damage. Repair any significant issues using wood filler and sanding.
- Decide on the design. This could involve leaving the wood natural, applying a clear sealant to preserve its character, or using a stain to enhance its color and grain.
- Cut the wood to the desired shape and size. This could involve simple geometric shapes or more complex designs.
- Sand the wood to achieve a smooth finish, paying attention to the edges and corners.
- Apply a finishing coat. This could be a clear sealant, a wood stain, or a combination of both. Multiple coats may be needed to achieve the desired level of protection and color.
- Once the finish is completely dry, the reclaimed wood artwork is ready to be hung.
Ultimately, wood wall decor offers a unique blend of natural beauty, durability, and versatility. By understanding the different types, materials, and design considerations, you can transform your living spaces into personalized oases of style and comfort. Whether you choose a rustic, modern, or bohemian aesthetic, the right wood wall decor can elevate your home’s ambiance and reflect your individual taste.
Embrace the artistry of wood and unlock the potential of your walls!